If you're here it means you're looking for a way to automate your job with Puppeteer-core. And we're here to help you out with that!
In this article, we'll share 3 different use cases:
- How to automate PDF generation of web pages
- How to automate screenshots & screencasts
- How to extract text from web pages automatically
We will share code snippets that you can copy & implement in your work. Even more, we have these code examples on Replit, so you can test Puppeteer-core automation with the push of a button.
Puppeteer-core vs Puppeteer
Puppeteer-core is a lightweight version of the Puppeteer library, with the exception that Puppeteer-core doesn't have Chrome binaries. But no worries, we'll be using a remote Chrome session with Browserless.
Prerequisites
Before we dive into the examples & code snippets, let us share what to do to implement and test the code easily and for free:
- We added code examples to Replit, so create your free account there to test the code on your own.
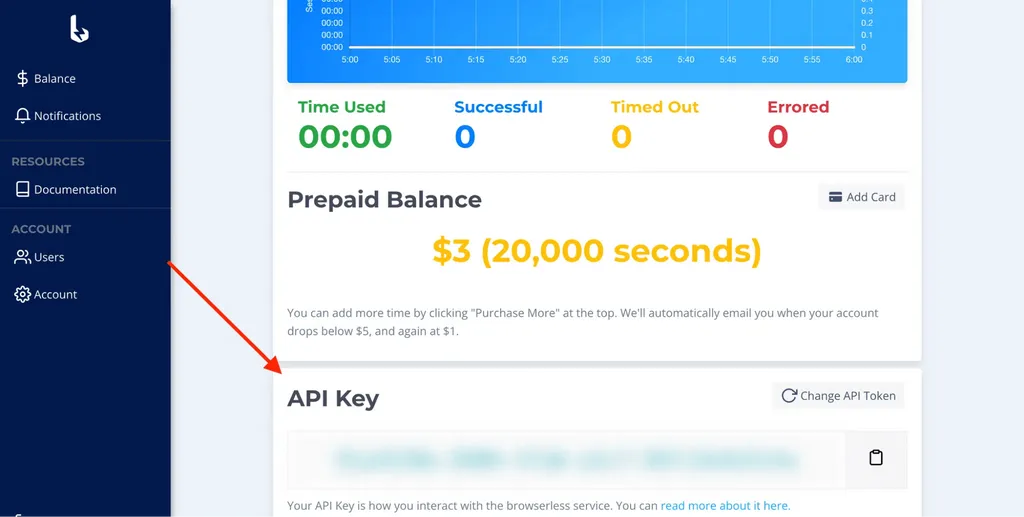
- We used Browserless for this web automation. Create your free account here. Use your Browserless Token to run the same code for yourself.
Puppeteer-core examples
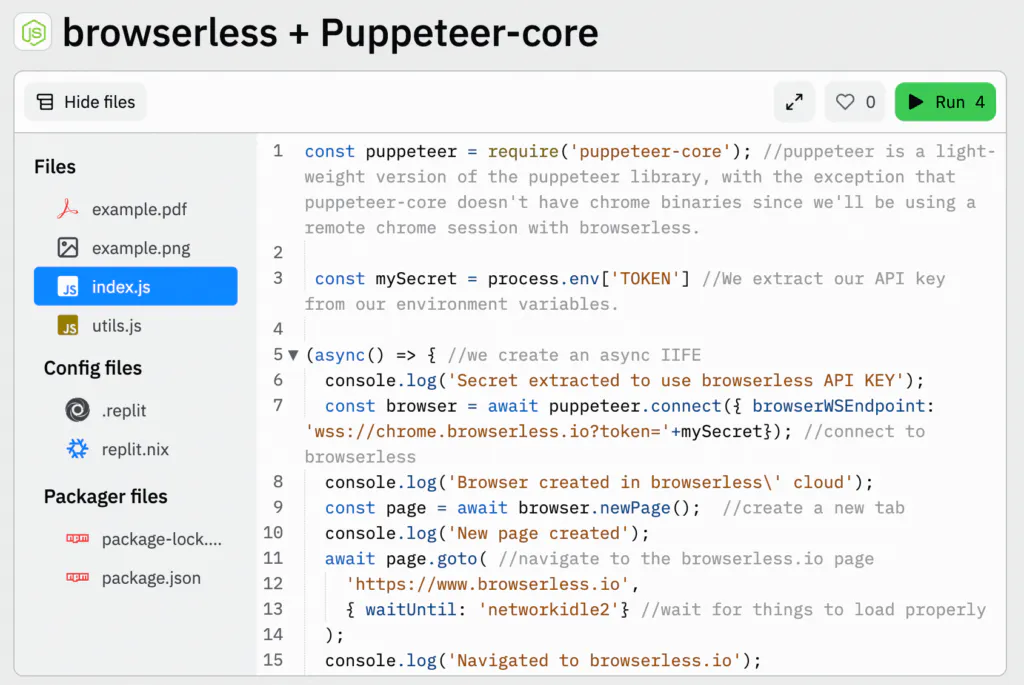
We’re sharing the code that does everything (PDF, PNG generation, and text extraction). You can take the parts of this code or use the full version of it. As the example, we’ll use the https://www.browserless.io/ page, but you can use it for other URLs:
const puppeteer = require("puppeteer-core"); //puppeteer is a light-weight version of the puppeteer library, with the exception that puppeteer-core doesn't have chrome binaries since we'll be using a remote chrome session with browserless.
const noApiKeyMessage =
  "█▓▒\n████▒\n████▒\n████▒   ▒██▓▒\n████▒   ▒████\n████▒   ▒████\n████▒   ▒████\n████▒   ▒████\n████▒   ▒████\n████▒   ▒██████▓▒\n████▒   ▒██████████▒\n████▒   ▒██████▓████\n████▒   ▒█▓▓▒  ▒████\n████▒          ▒████\n████▒       ▒▓██████\n████▒   ▒▓████████▓▒\n████▓▓████████▓▒\n██████████▓▒\n  ▓███▓▒\n\nYou'll need an API key for this to work, follow these steps:\n\n1) Create a free Replit account @ https://replit.com/signup\n2) Fork this project\n3) Create a free browserless account @ https://www.browserless.io/sign-up\n4) Log into your browserless account @ https://cloud.browserless.io/account/ and copy your API key\n5) Go to your forked repo and add a secret called TOKEN with your API key as the value.\n6) Click on RUN and it works!";

(async () => {
  //we create an async IIFE
  const myBrowserlessAPIKey = process.env["TOKEN"]; //We extract our API key from our environment variables.
  if (!myBrowserlessAPIKey)
    //If the token isn't retrieved, explain it must be added
    return console.log(noApiKeyMessage); //print this string
  console.log("Secret extracted to use browserless API KEY");
  const browser = await puppeteer.connect({
    browserWSEndpoint: "wss://chrome.browserless.io?token=" + myBrowserlessAPIKey,
  }); //connect to browserless
  console.log("Browser created in browserless' cloud");
  const page = await browser.newPage(); //create a new tab
  console.log("New page created");
  await page.goto(
    //navigate to the browserless.io page
    "https://www.browserless.io",
    { waitUntil: "networkidle2" }, //wait for things to load properly
  );
  console.log("Navigated to browserless.io");
  await page.waitForSelector("h1"); //wait for the first title element to be available
  const title = await page.evaluate(() => {
    //evaluate the elements on the page
    return document.querySelector("h1").innerHTML; //return the innerHTML of the first title element found
  }); //generate a screenshot named example.png
  console.log("Title extracted!: " + title); //log the text of the first title element found
  await page.screenshot({ path: "example.png" }); //generate a screenshot named example.png
  console.log("Screenshot generated!");
  await page.emulateMediaType("screen");
  await page.pdf({ path: "example.pdf" }); //generate a screenshot named example.png
  console.log("PDF generated!");
  browser.close(); //close the browser so we don't spend extra seconds of our credit
  console.log("Browser closed - clean up time!");
  console.log("End of script");
})().catch((error) => {
  //if there are any errors with the code above, do the following things:
  console.log(error); //print the error stack trace
});
How to try Puppeteer-core
You can try this code example on Replit:
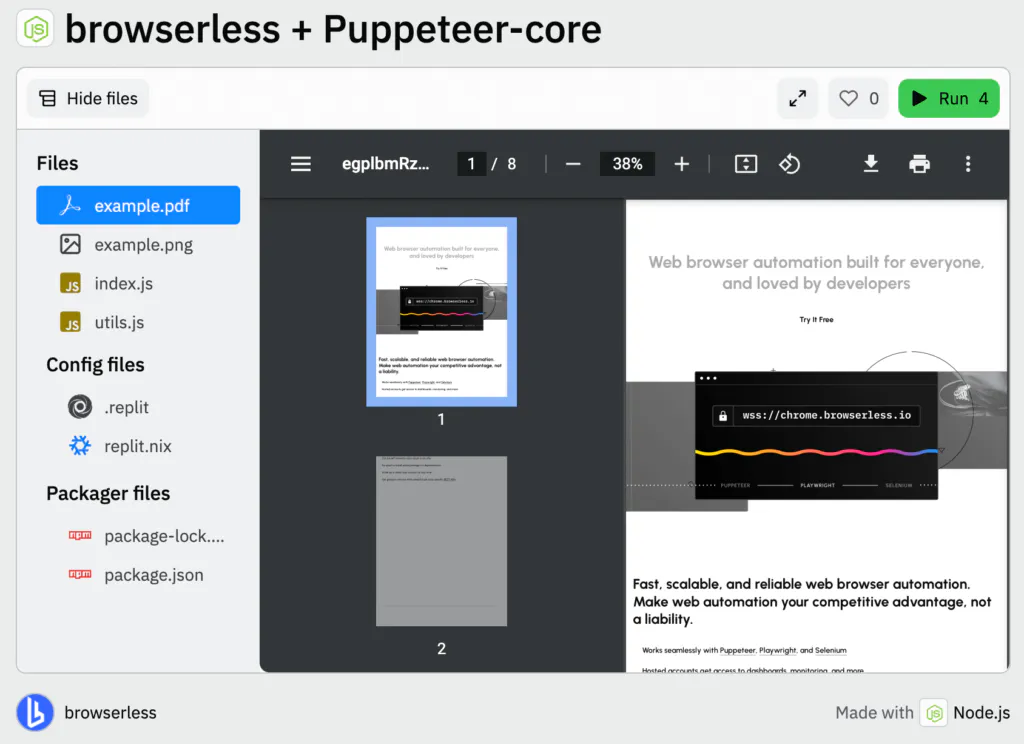
Right there, you can see the results of the automation. For example, this is how the PDF was generated from the browserless.io URL:
How to get started with Browserless
There are different ways to use our product.
- Use our online debugger to try it out!
- Sign up for a free account and get an API key. You have 6 hours of usage for free! After that, you can pay as you go, and only pay per second that you use!
- You can self-host for development purposes by using our open source browserless docker image
- If you’ve already tested our service and want a dedicated machine for your requests, you might be interested in signing up for a dedicated account. This works best if you’re doing screencasting or have a heavy load of requests since you won’t be sharing resources.
If you’re using one of our hosted services; be that usage-based or capacity-based, just connect to our WebSocket securely with your token to start web automation!