What is browser automation?

It is a process of controlling a browser’s behavior or interacting with it programmatically. By automating a browser, we can easily automate routine tasks, scrape data from websites more systematically, test websites for UI / UX flows, run automatic performance tests, and many other things.
Use cases of browser automation
- Automating your routine tasks
- Example: Checking your social media followers (will share this use case in this article below)
- Browser test automation
- Example: Testing sign-up form flow (for example, here is how Samsara does stress testing)
- Cross browser automation testing
- Example: Testing your image gallery UI on different browsers and platforms
- Data Scraping
- Example: Scraping data from Google maps, you can know more about this here
- Performance testing (browser testing automation)
- Example: Checking lighthouse score automatically, at given intervals, or every time you deploy to your staging setup or website test automation
Tip: You can even test chrome extensions* - More about this here
Browser automation tools
Since web automation is done through the browser, the browser you wish to use must offer a way to control it. Each of the popular browsers has a different way of supporting this.
The chromium-based browsers have had the most significant advantage in this space since the dawn of Chrome DevTools APIs. Browser automation tools built using the DevTools API can automate chromium-based browsers. In the same way, Safari and Opera have WebDrivers which allow tools like puppeteer and playwright to interact with them programmatically.
Tools like Puppeteer allow us to control chromium-based browsers both in headless (where the browser doesn’t open, but the automation runs in the background) and non-headless (or headful) (in this case, you can see the browser doing the automation) modes.
Some popular chromium-based browsers are Chromium, Google Chrome, Microsoft Edge, and Opera (varies according to platform, check this out for more details https://dev.opera.com/articles/browsers-modes-engines).
If you need a tool that has a similar API to that of Puppeteer but has support for a variety of browsers, you can also check out Playwright (https://playwright.dev), made by the same team that built Puppeteer after they moved to Microsoft.
Don't know what to choose for browser automation? Check out the "Playwright vs Puppeteer" guide.
If you need one tool to control different types of browsers then Selenium browser automation (https://www.selenium.dev) can be your go-to.
As you can see, many tools let you automate browsers. You can choose based on your use case and the browsers you want to automate.
Some use-cases of automation a browser
Let us explore some of the real-world browser automation javascript use cases.
For the sake of the article, the examples are in Puppeteer
Note: Puppeteer supports chrome and chromium-based browsers only
A simple puppeteer setup would look something like this.
- Create a yarn or npm project
yarn init
or
npm init -y
- Install puppeteer
yarn add puppeteer
or
npm install puppeteer
- We will create a sample script to showcase the use of puppeteer
Once we do this, we can implement browser automation:
Browser test automation example
We will use the Jest testing framework to demo a simple example of how you can use Puppeteer along with Jest.
We need to install jest and jest-puppeteer for this particular example.
- Run
yarn add jest jest-puppeteerornpm install jest jest-puppeteer - Create a file called
jest.config.jsand populate it with the below content
const config = {
  preset: "jest-puppeteer",
};

module.exports = config;
You can know more about jest.config.js here.
describe("Browserless.io landing page", () => {
  beforeAll(async () => {
    await page.goto("https://www.browserless.io");
  });

  it(`Landing page hero title should be correct`, async () => {
    const headingText = page.evaluate(() => {
      return document.querySelector("h1").textContent;
    });
    await expect(headingText).resolves.toMatch(
      "Web browser automation built for everyone, and loved by developers",
    );
  });
});
Run this script with node landing.test.js
You should see something like this 👇.
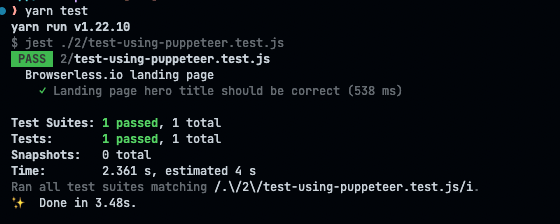
This script makes sure that the main heading is always correct. It’s an elementary test, but you should be able to get the gist.
Data scraping example
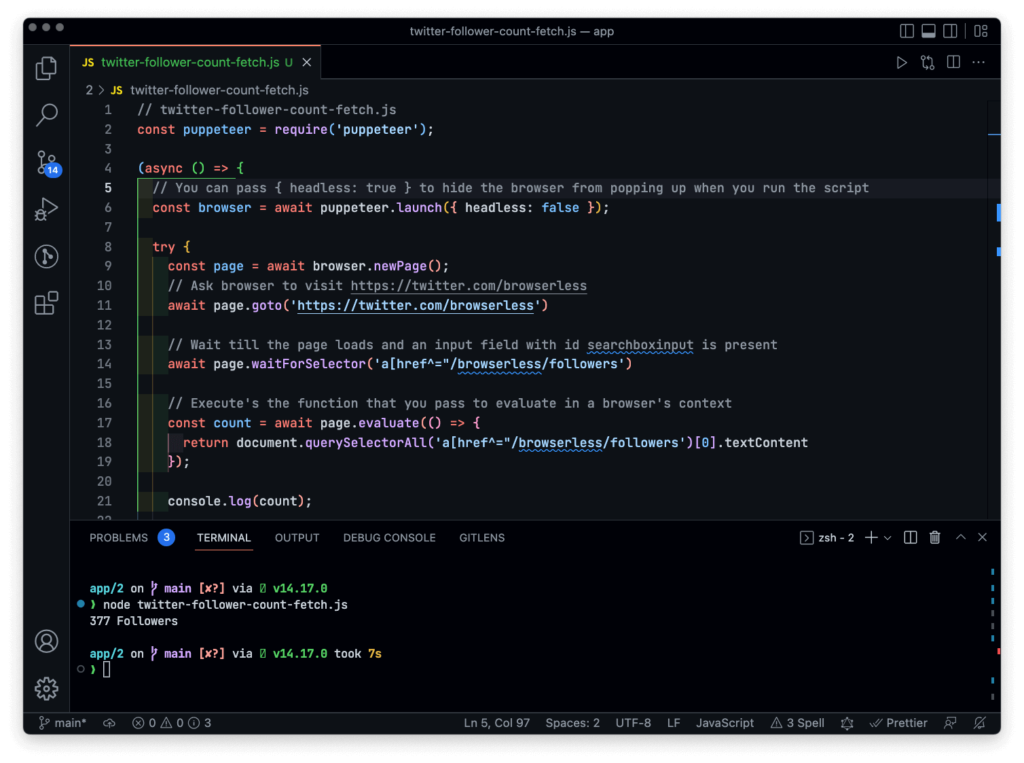
We've been sharing a lot of different data scraping examples with copy & paste code snippets. For example: YouTube scraper guide, Glassdoor scraping, and many others. In this article, we'll show you how to scrape Twitter followers count:
// twitter-follower-count-fetch.js
const puppeteer = require("puppeteer");

(async () => {
  // You can pass { headless: true } to hide the browser from popping up when you run the script
  const browser = await puppeteer.launch({ headless: false });

  try {
    const page = await browser.newPage();
    // Ask browser to visit https://twitter.com/browserless
    await page.goto("https://twitter.com/browserless");

    // Wait till the page loads and an input field with id searchboxinput is present
    await page.waitForSelector('a[href^="/browserless/followers');

    // Execute's the function that you pass to evaluate in a browser's context
    const count = await page.evaluate(() => {
      return document.querySelectorAll('a[href^="/browserless/followers')[0]
        .textContent;
    });

    console.log(count);

    browser.close();
  } catch (error) {
    console.log(error);
  }
})();
Once you run this script using node twitter-follower-count-fetch.js, the result should be something like this 👇.
How to level up your Browser Automation flow
As you can see in the examples, browser automation can help us in many different areas. But it has shortcomings when you start deploying these into production at scale. If you are looking to automate not-so-important tasks, then it might not be too much trouble to manage the whole setup.
What if you run a product that generates screenshots for your client’s websites on every deployment? In this case, you must be ready all the time. Plus, it’s not just about uptime. Apart from automating the browsers, you have to automate the overall flow of generating screenshots in this case. Instead of building your primary business workflows, you might end up configuring/managing these setups.
In situations like these, it’s usually better to offload the overhead to companies built explicitly for this, just like offloading your email systems to companies like SendGrid or Mailgun.
Services that can take overhead off of you
- browserless.io can help you manage most of the infrastructure while scaling it reliably so that you can focus on your product and business logic.
- Browserless also allows you to use Puppeteer, Playwright, or Selenium web browser automation tools
- You can monitor your usage in a one central dashboard
- Use the REST APIs to do more complex management
Imagine building all of this or working on browser automation without these features.
Let’s see some sample use-case of browserless.io
Using browserless.io’s REST APIs
Run the below code in your terminal, don’t forget to replace YOUR_API_TOKEN_HERE with your actual browserless.io API token. You can get one by setting up a trial account for free here.
# Automatically responds in seconds with a PDF download
curl -X POST \
  https://chrome.browserless.io/pdf?token=YOUR_API_TOKEN_HERE \
  -H 'Cache-Control: no-cache' \
  -H 'Content-Type: application/json' \
  --output google.pdf \
  -d '{
  "url": "https://google.com",
  "options": {
    "displayHeaderFooter": true,
    "printBackground": false,
    "format": "A0"
  }
}'
Using Puppeteer
In this case, you are not required to launch a chrome instance at all. Instead, you will be connecting to the remote browserless.io instance via your Browserless API key.
One thing to note here is that Puppeteer, by default, ships along with a chromium browser, but in cases like the below example where you might not need a whole browser to run it locally because you will be using a provider like browserless.io. You can use the driver only.
// screenshot.js
const puppeteer = require("puppeteer-core");

(async () => {
  try {
    const browser = await puppeteer.connect({
      browserWSEndpoint: "wss://chrome.browserless.io?token=YOUR_API_TOKEN_HERE",
    });

    const page = await browser.newPage();
    await page.goto("https://google.com");
    await page.screenshot({ path: "screenshot.png" });
    browser.close();
  } catch (error) {
    console.log(error);
  }
})();
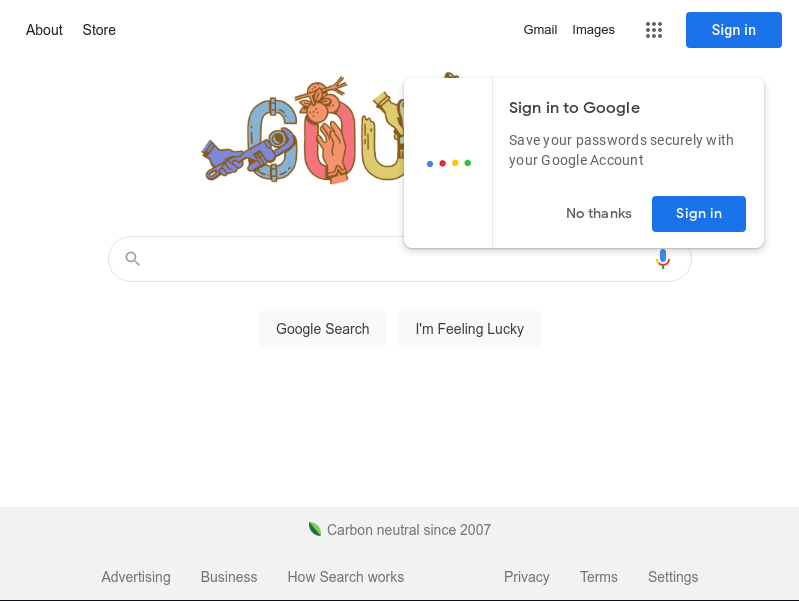
Run this with node screenshot.js.
Post which you should have a screenshot of the Google home page saved in your current directory:
Browser automation is an exciting approach. I hope this article sheds some light on browser automation’s uses, how to achieve it, the roadblocks when doing this in production and how you can use external services.
P.S.
If you like this article about browser automation, you can check out our best guides on this topic: